UPDATE 23th of February 2017: The vermicompost we built got mouldy. We used a lot of cardboard to darken the box, which was see-through. The cardboard soaked up a lot of water. I would not recommend this technique 🙂 So we built another box for the worms, using black containers this time. Also, I removed some instructions with this tool. You´ll notice this text being a bit wild by now.
Dear Friends,
this post is all about vermicomposting. A vermicompost is a compost with worms. Who would have thought that :). It is non smelly (if handled cautiously) and produces very fertile soil. It is possible to have a vermicompost outside, as well as inside. Which means you can decide to have one on your balcony or even in your living room, or basement etc.
The reasons why I wanted to do a vermicompost was just to try it out, to have some soil soon for the growing of the vegetables and to see how the worms actually make compost in less than 3 month. We put our vermicompost under the terrace which is close to the kitchen and shaded and the space is mainly unused otherwise. Despite of the produced compost, another good reason to have a vermicompost is the worm pee. The vermicompost produces a liquid that drops out from the bottom, which can be used as a fertilizer, when diluted 20:1.
The worms we use are called red wigglers (Eisenia foetida) and they are recommended for vermicomposting. I found a site where they recommended to buy 500 worms per person producing kitchen scraps, but that sounded a lot so I decided to buy 1000 worms for four to five people. I bought them online and they came with the post.
So what do compost worms like and need?
- They like a dark environment
- They like temperatures between 4 – 25 °C
- They like a wet to the touch but not dripping environment
- They need oxygen
- They need food
And what do they eat? (Or what we will feed them)
- vegetable scraps
- fruit scraps
- no garlic
- no onion
- no citrus fruits
- no chilis
I read that they do eat citrus fruits, but somewhere else I read they don´t. So I want to stay on the save side. If the worms are not satisfied they will try to flee and we have to think about how to stop them.
Now let’s get started 🙂
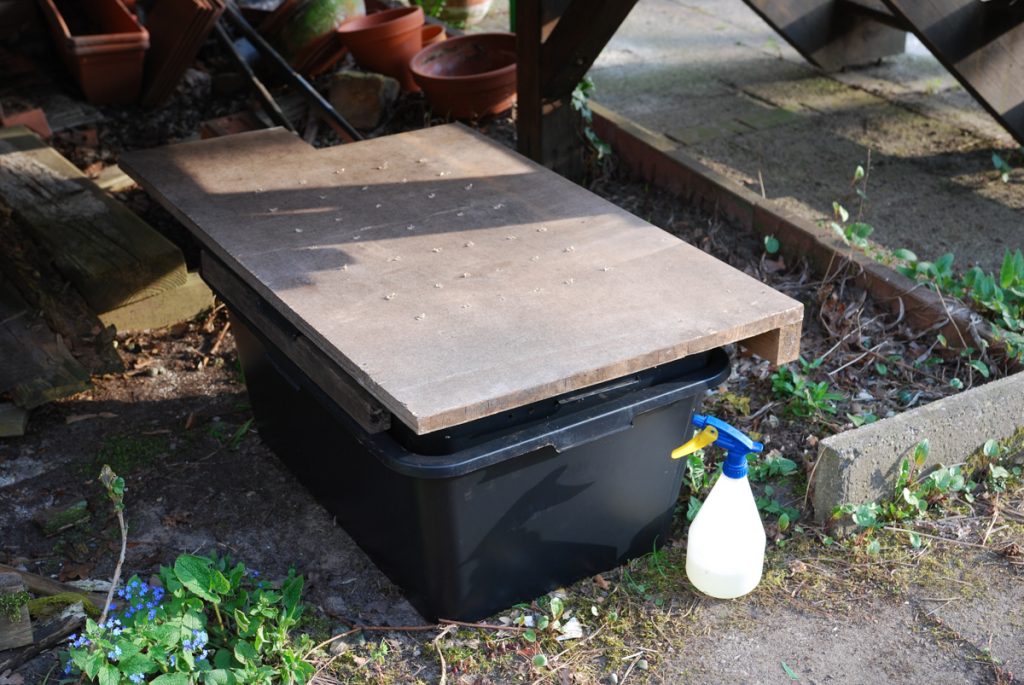
Vermicompost like we did
What you need:
- compost worms
one or optionaltwo containers with one lid(preferably dark, we had used a see through container and made it dark by using card board) UPDATE: definitely use a dark container. Use two containers for saving the worm pee in the lower onesome mosquito net or something similarUPDATE: When the worms are in good conditions (not too many, right moisture and enough food), they don´t try to flee. The mosquito net is not necessary.- newspaper
- some water
- kitchen scraps
- optional: some earth or compost
You also need a drill and some glue that will stick to the material you use. We used a hot glue gun.
How to assembly everything:
- Drill holes in the bottom of your container. If you use two containers you only drill them in one. This will be the container where the worms live in and the extra container will be the one where you gather the worm pee.
- Drill holes in the side of the container near the upper edge.
Cover all holes with the mosquito net or some other net that is small enough so that the worms can not escape through the holes you drilled. We used the hot-melt gun for that.Don´t need this.Crumple up the newspaper into fist big balls and put them in the bottom of your container (leave this step out when you work with two containers).UPDATE: not necessary.Put one layer of newspaper over that and water it.UPDATE: No need for that either- Distribute some of the compost or earth on this (optional).
- Put worms inside.
- Put some kitchen scraps on one side of the bin.
Sprinkle water over the system until it is nicely humid, but not soaking wet.- Cover the worms and the kitchen scraps with another humid layer of newspaper. UPDATE: this is completely optional. I found the content to be more likely to get moldy when covered with humid newspaper. So I mostly skip it. It may though be a good protections against fruit flies.
- Place both containers into one another if you use two to gather the worm pee.
- Close the lid.
Done!
Reflections
So this is a good place to tell you what I will do different the next time when building a vermicompost. First of all it is better to use a dark container that is not see through, so you don´t need to darken it. It saves work and is actually very logical. I was also thinking a lot about the amount of plastic we used. The box is plastic and the hot glue gun also. When we would have build the box our self, using wood, we could have spared that. But this would take longer time and so I just hope to make good use of the compost, that the plastic will have a long and useful lifespan.
The last days I looked at them a couple of times and they where eating. I made sure the moisture was right so it seems pretty good :).
Thanks to Marianne for helping me building this compost!
Best wishes,
Melea